DoITPoMS Teaching and Learning Packages
Optical Microscopy and Specimen Preparation
Metallographic Specimen Preparation
Cutting a specimenWhen cutting a specimen from a larger piece of material, care must be taken to ensure that it is representative of the features found in the larger sample, or that it contains all the information required to investigate a feature of interest. One problem is that preparation of the specimen may change the microstructure of the material, for example through heating, chemical attack, or mechanical damage. The amount of damage depends on the method by which the specimen is cut and the material itself. Cutting with abrasives may cause a high amount of damage, while the use of a low-speed diamond saw can lessen the problems. There are many different cutting methods, although some are used only for specific specimen types. MountingMounting of specimens is usually necessary to allow them to be handled easily. It also minimises the amount of damage likely to be caused to the specimen itself. The mounting material used should not influence the specimen as a result of chemical reaction or mechanical stresses. It should adhere well to the specimen, and if the specimen is to be electropolished later in the preparation then the mounting material should also be electrically conducting. Specimens can be hot mounted (about 150 °C) using a mounting press either in a thermosetting plastic, e.g. phenolic resin, or a thermosoftening plastic e.g. acrylic resin. If hot mounting will alter the structure of the specimen a cold-setting resin can be used, e.g. epoxy, acrylic or polyester resin. Porous materials must be impregnated by resin before mounting or polishing, to prevent grit, polishing media or etchant being trapped in the pores, and to preserve the open structure of the material. A mounted specimen usually has a thickness of about half its diameter, to prevent rocking during grinding and polishing. The edges of the mounted specimen should also be rounded to minimise the damage to grinding and polishing discs.
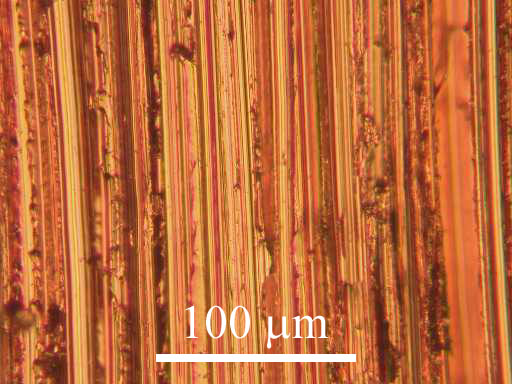
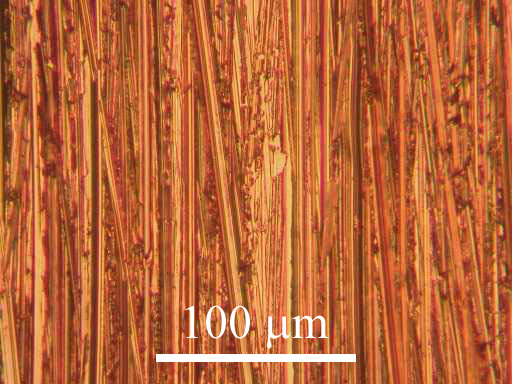
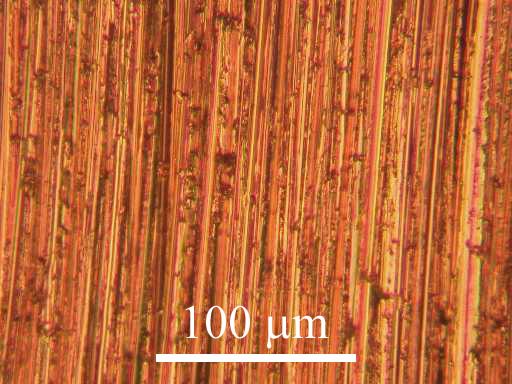
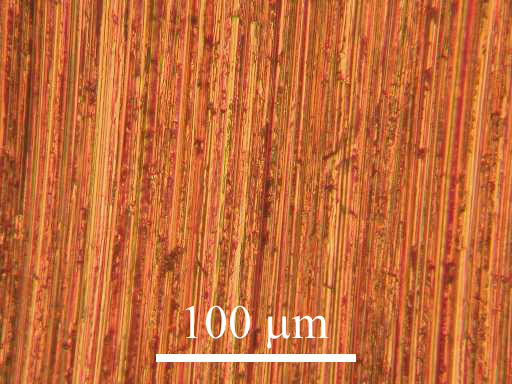
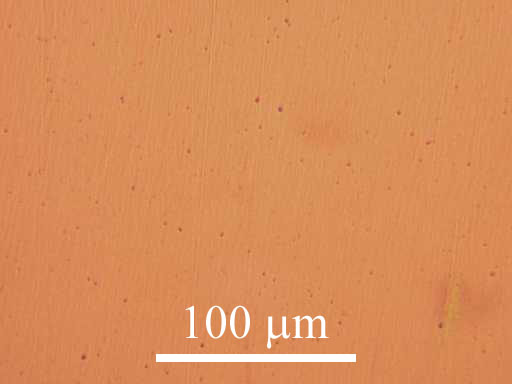
A mounted specimen (shows typical dimensions) GrindingSurface layers damaged by cutting must be removed by grinding. Mounted specimens are ground with rotating discs of abrasive paper, for example wet silicon carbide paper. The coarseness of the paper is indicated by a number: the number of grains of silicon carbide per square inch. So, for example, 180 grit paper is coarser than 1200. The grinding procedure involves several stages, using a finer paper (higher number) each time. Each grinding stage removes the scratches from the previous coarser paper. This can be easily achieved by orienting the specimen perpendicular to the previous scratches. Between each grade the specimen is washed thoroughly with soapy water to prevent contamination from coarser grit present on the specimen surface. Typically, the finest grade of paper used is the 1200, and once the only scratches left on the specimen are from this grade, the specimen is thoroughly washed with water, followed by alcohol and then allowed to dry. The drying can be made quicker using a hot air drier. Cleaning specimens in an ultrasonic bath can also be helpful, but is not essential. The series of photos below shows the progression of the specimen when ground with progressively finer paper.
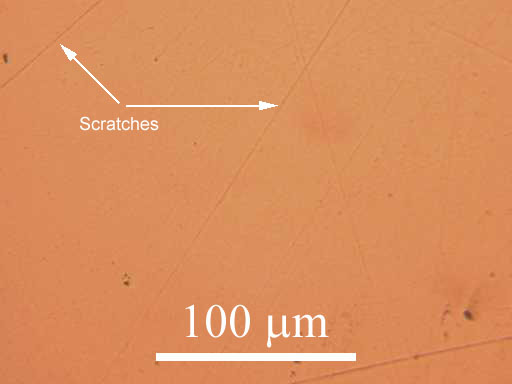
LappingThe lapping process is an alternative to grinding, in which the abrasive particles are not firmly fixed to paper. Instead a paste and lubricant is applied to the surface of a disc. Surface roughness from coarser preparation steps is removed by the micro-impact of rolling abrasive particles. PolishingPolishing discs are covered with soft cloth impregnated with abrasive diamond particles and an oily lubricant. Particles of two different grades are used : a coarser polish - typically with diamond particles 6 microns in diameter which should remove the scratches produced from the finest grinding stage, and a finer polish – typically with diamond particles 1 micron in diameter, to produce a smooth surface. Before using a finer polishing wheel the specimen should be washed thoroughly with warm soapy water followed by alcohol to prevent contamination of the disc.
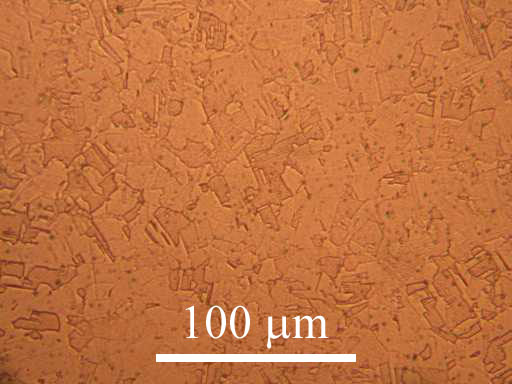
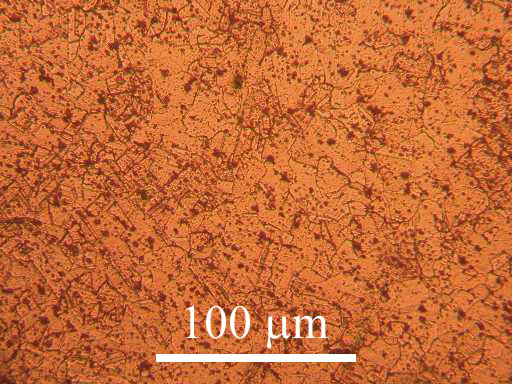
Mechanical polishing will always leave a layer of disturbed material on the surface of the specimen. Electropolishing or chemical polishing can be used to remove this, leaving an undisturbed surface. EtchingEtching is used to reveal the microstructure of the metal through selective chemical attack. In alloys with more than one phase etching creates contrast between different regions through differences in topography or the reflectivity of the different phases. The rate of etching is affected by crystallographic orientation, so contrast is formed between grains, for example in pure metals. The reagent will also preferentially etch high energy sites such as grain boundaries. This results in a surface relief that enables different crystal orientations, grain boundaries, phases and precipitates to be easily distinguished. The specimen is etched using a reagent. For example, for etching stainless steel or copper and its alloys, a saturated aqueous solution of ferric chloride, containing a few drops of hydrochloric acid is used. This is applied using a cotton bud wiped over the surface a few of times (Care should be taken not to over-etch - this is a difficult point to determine, however, the photo below may be of some help). The specimen should then immediately be washed in alcohol and dried. Following the etching process there may be numerous small pits present on the surface. These are etch pits caused by localised chemical attack, and in most cases they do not represent features of the microstructure. They may occur preferentially in regions of high local disorder, for example where there is a high concentration of dislocations. If the specimen is over etched, ie. etched for too long, these pits tend to grow, and obscure the main features to be observed - as seen in the images below:
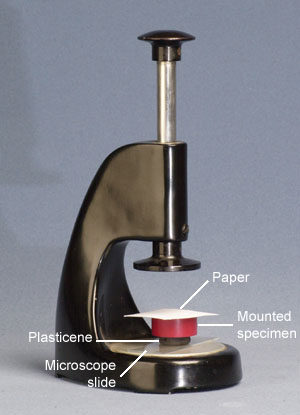
Ideally the surface to be examined optically should be perfectly flat and level. If not, then as the viewing area is moved across the surface it will pass in and out of focus. In addition, it will make it difficult to have the whole of the field of view in focus - while the centre is focused, the sides will be out of focus. By using a specimen levelling press (shown below) this problem can be avoided, as it presses the mounted specimen into plasticene on a microscope slide, making it level. A small piece of paper or cloth covers the surface of the specimen to avoid scratching.
Specimen levelling press |
||||||||||||||||
|
© University of Cambridge DoITPoMS, Department of Materials Science and Metallurgy, University of Cambridge |